Vibration Analysis for Predictive Maintenance of Rotating Machines Using Bytebeam
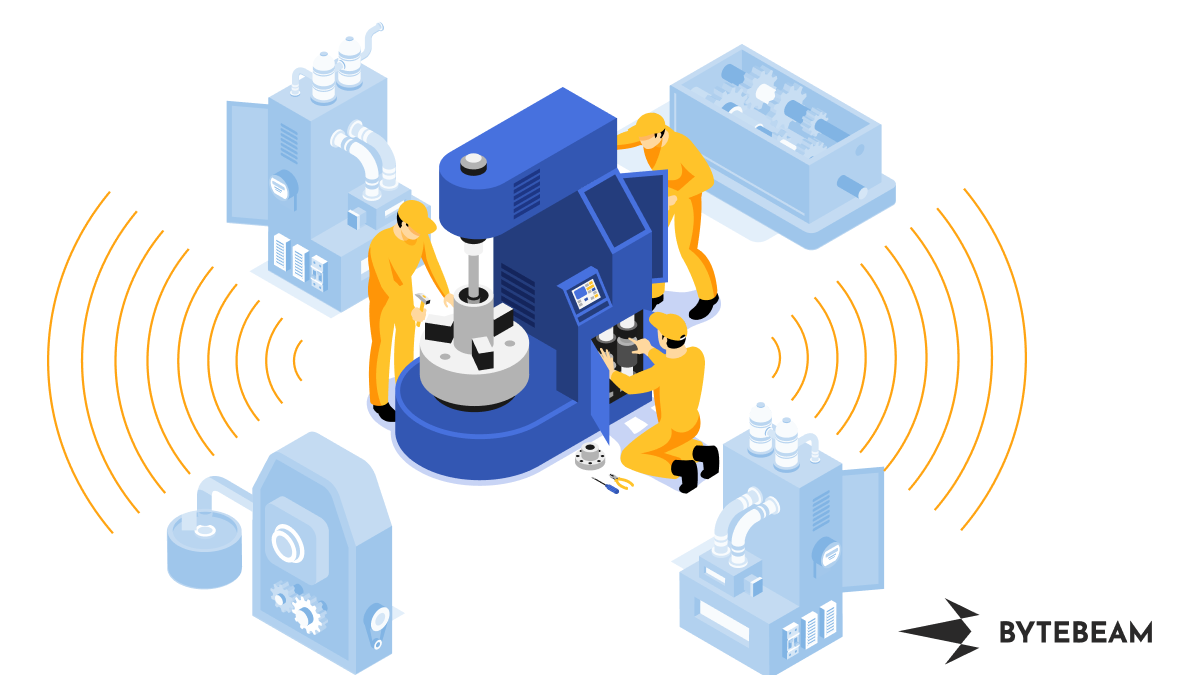
Irregular vibration accelerates machine degradation. Vibration analysis detects faults, preventing costly breakdowns, minimizing downtime, and extending machine lifespan.
Rotating machines like wind turbines, hydro turbines, induction motors etc face a different kind of wear and Tear. The key indicator of most of these faults is abnormal vibration in the machine. These machines are often operated under heavy duty and with minimal downtime. The main faults that occur in these are following
- Irregular radial and tangential forces.
- Irregular mechanical behavior.
- Bearing faults, rotor bar, and end ring faults in case of squirrel cage induction
- Motor stator faults and air gap eccentricity in rotors.
These irregular vibrations can result in faster degradation of the machine, and noise, and can affect the mechanical behavior of the machine. Predictive maintenance using machinery vibration analysis provides a detailed examination of the detection, location, and diagnosis of faults in rotating and reciprocating machinery using vibration analysis. U.S. Department of Energy Operations says that preventive maintenance can result in energy savings of as much as 18%. So, predictive maintenance not only enhance the equipment's lifespan but also save you on maintenance bills.
In this guide, we will be demonstrating the use Bytebeam cloud platform to do vibration analysis for predictive maintenance of faulty motors. In this blog, we will be demonstrating the following:
- Setting up the Bytebeam cloud console: We will go through creating an account and setting up a new project on the Bytebeam cloud console.
- Setting Up ESP32: We will set up ESP 32 and integrate the MPU6050 accelerometer for calculating vibrations.
- Provisioning ESP32: We will provision ESP32 using provisioning JSON.
- Connecting an ESP32 to the Bytebeam platform: We will learn how to connect an ESP32 to the Bytebeam platform and how to send data from the device to the cloud.
- Data visualization on the Bytebeam cloud console: We will explore the data visualization tools by Bytebeam and learn how to view and analyze data from the connected Arduino device in real time.
Hardware and Software Specifications
Hardware Specification
- ESP32
- MPU6050
Software Specification
- Bytebeam cloud platform account
- Arduino IDE
- Bytebeam Arduino SDK
- MPU6050 Arduino Library
- Vibration Analysis Arduino application
Setting Up Bytebeam Cloud
Bytebeam is a fully managed cloud platform. Which serves all cloud needs from device management to dashboard, Handling actions and notification to OTA updates. It provides the following features
- Device Registry
- Over Air Updates
- Configuration Management
- Device the mobile communication
- Web Dashboard
- Role-based Access controls
If you are new to the Bytebeam IoT cloud platform. Go through the getting started with Bytebeam tutorial to deep dive into the concepts of Bytebeam. I hope you found the getting started guide useful and are aware of the concepts of Bytebeam Cloud.
- First, create a new device for that got to the Device Management panel and click on Create device
- As you hit submit in the prompt. A new JSON file will be downloaded which contains the authentication certificate, broker, device_id, and project id. You need to save this file in the ESP file system. We will talk about this in a later section.

- The JSON will look like this.
{
 "project_id": "****",
 "broker": "******",
 "port": 8883,
 "device_id": "**",
 "authentication": {
      "ca_certificate":*"*********",
      "device_certificate": "**********",
      "device_private_key": "***********"
      }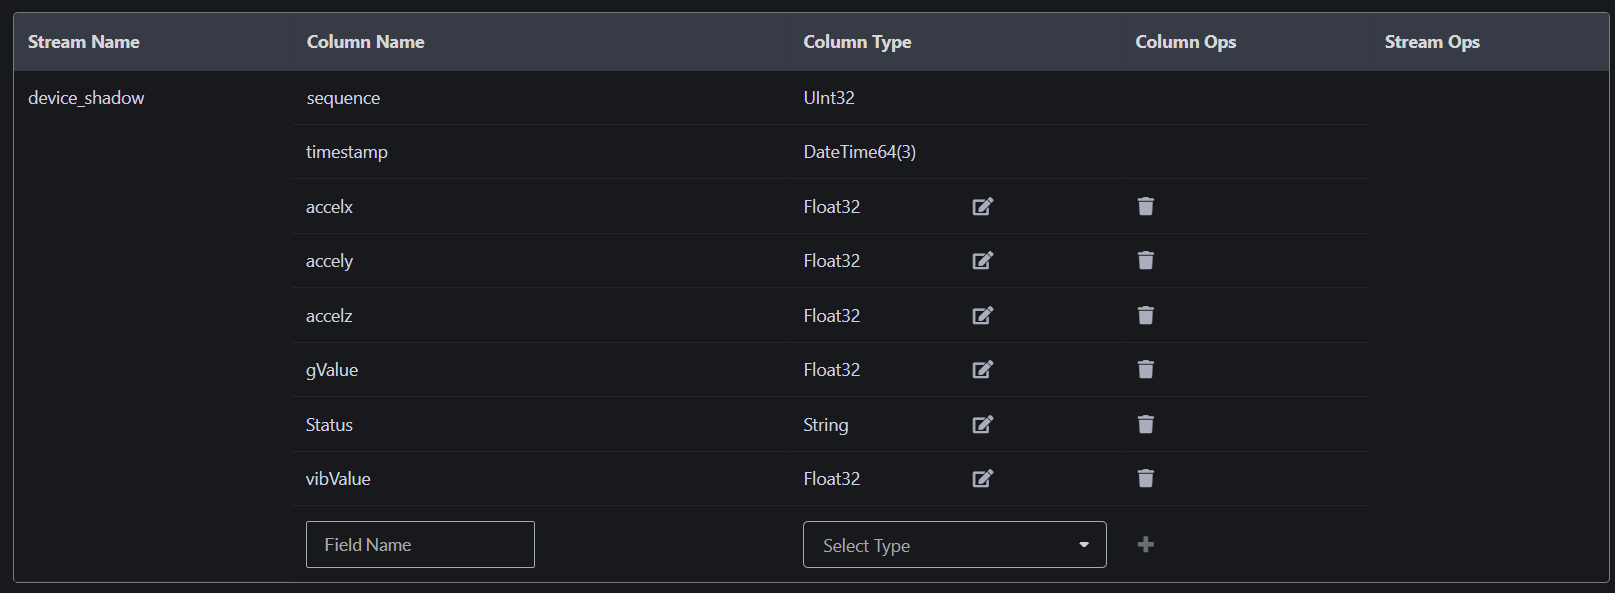
}- Next, as we are using accelerometer parameters. We need to configure the stream according to our project in the Bytebeam cloud console. For that go to Admin -> Streams and add accelx, accely, accelz, gValue and vibValue in the column name with their respective data type. Here accelx, accely, and accelz are raw acceleration values. gValue is acceleration magnitude and vibValue is vibration velocity. We will be explaining this in a later section.
Setting Up ESP32
This guide assumes that you are familiar with Arduino and had your ESP32 setup on Arduino IDE. The next steps will guide you through the project setup and hardware connection
Hardware connection
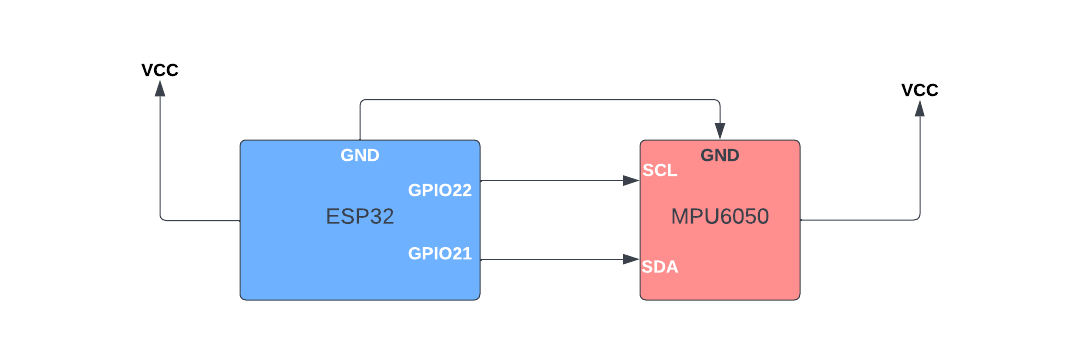
ESP32 uses GPIO 21 and GPIO 22 pins for I2C. The SDA pin is connected to GPIO 21 and SCL pin is connected to GPIO 22.
- MPU6050 sensor comes with an I2C connection. Connect the SDA Pin of MPU6050 with GPIO21 of ESP32 and the SCL Pin with GPIO 22 of ESP32.
Project Setup
Firstly to get started with Bytebeam SDK for Arduino, you need to install the Bytebeam Arduino library. This can be downloaded from the Arduino library manager. To get more understanding of Bytebeam Arduino installation and provisioning of ESP32 go through our 3-part tutorial series:
Getting acceleration values
- Clone VibrationAnalysisBytebeam repository from GitHub. This repository uses the following Arduino libraries
- Open the VibrationAnalysisBytebeam project and uploads it to ESP32
- Once the project has been flashed. Open the serial Monitor to debug the project.
Code Overview
- In src.ino include MPU6050 library header and declare MPU6505 client
#include <Adafruit_MPU6050.h>
#include <Adafruit_Sensor.h>

Adafruit_MPU6050 mpu;- To initialize MPU6050 call begin()
bool mpuInit(Adafruit_MPU6050 *mpu)
{
  if (!mpu->begin())
  {
    DEBUG_PRINTLN("Couldn't find MPU6050");
    return false;
  }
  mpu->setHighPassFilter(MPU6050_HIGHPASS_0_63_HZ);
  mpu->setMotionDetectionThreshold(1);
  mpu->setMotionDetectionDuration(20);
  mpu->setInterruptPinLatch(true);	// Keep it latched.  Will turn off when reinitialized.
  mpu->setInterruptPinPolarity(true);
  mpu->setMotionInterrupt(true);
  return true;
}- call getEvent() MPU6050 aceeleration values.
sensors_event_t a, g, temp;
mpu6050->getEvent(&a, &g, &temp);
deviceShadowJsonObj_1["accelx"] = a.acceleration.x;
deviceShadowJsonObj_1["accely"] = a.acceleration.y;
deviceShadowJsonObj_1["accelz"] = a.acceleration.z;
Getting vibration velocity
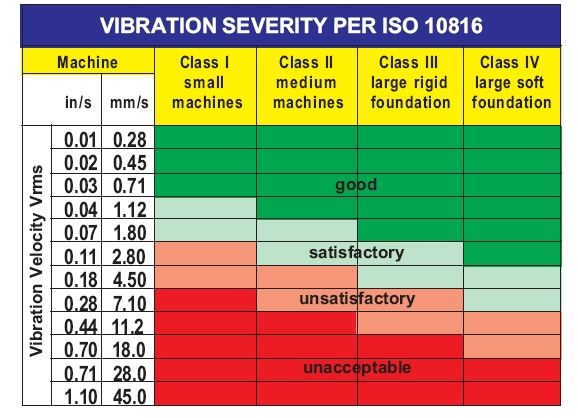
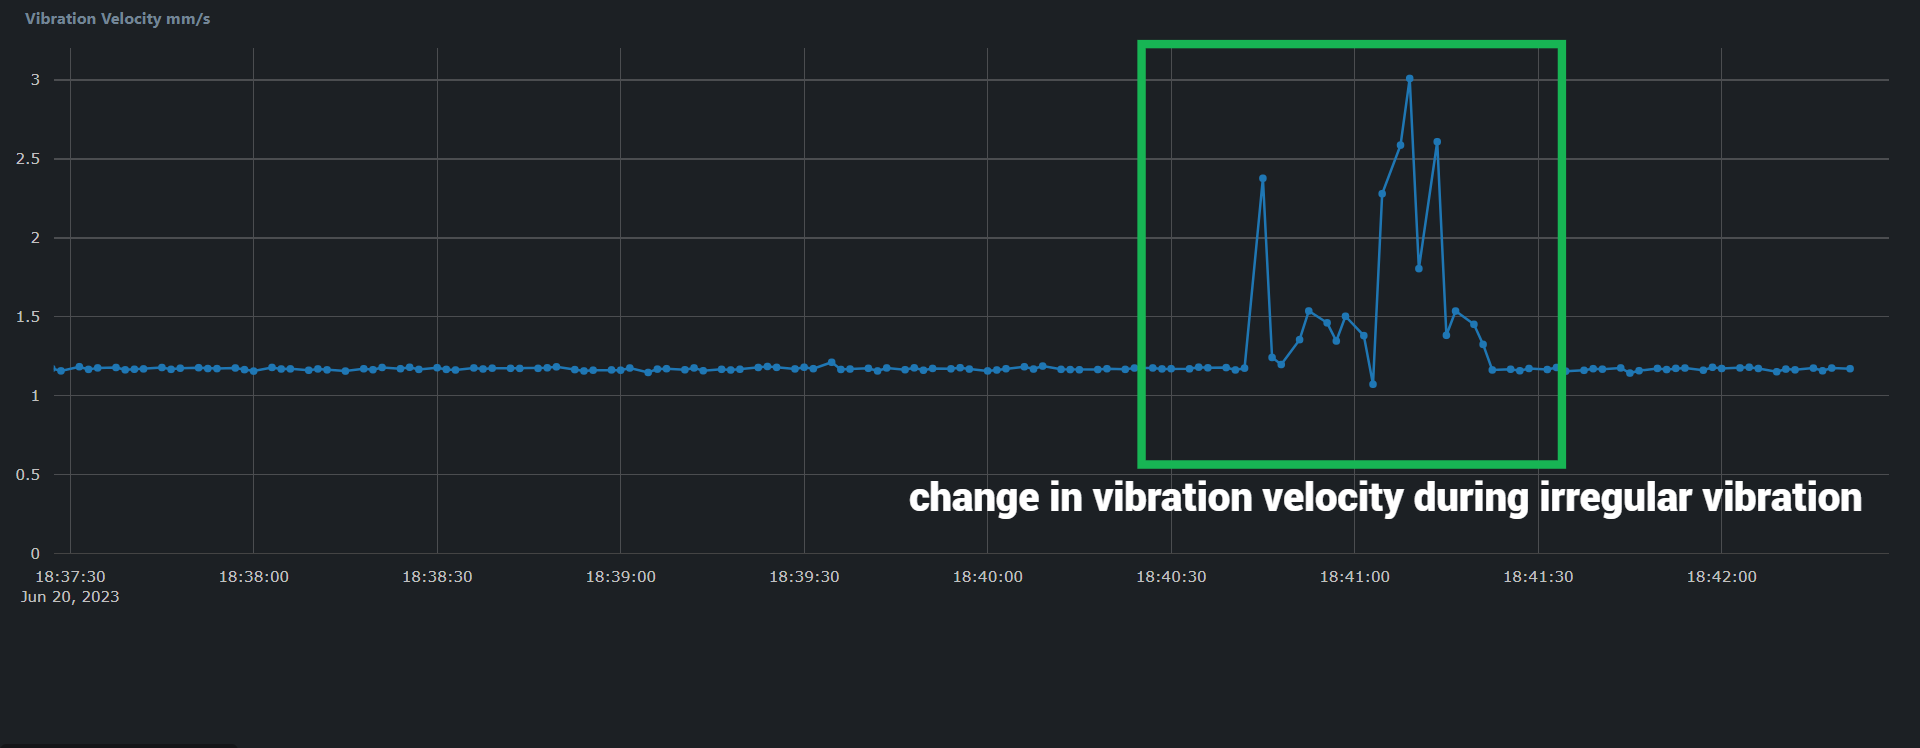
Considering the guidelines of ISO10816, vibration in machines is calculated in vibration velocity(mm/sec). Vibration velocity refers to the rate at which a vibrating object or structure moves back and forth over a specific period of time. ISO 10816 has been one of the first and mostly developed standards for vibration evaluation of machinery including different types of machinery like wind turbines, hydro turbines, gas turbines & steam turbines, reciprocating machinery, etc.
We can calculate vibration velocity using the following steps.
- Our sensor is set to full-scale +/-2G sensitivity. the conversion formula for a 16-bit signed integer value would be acceleration_g = acceleration_raw / (16384 * sensitivity_range). This will give us g values respectively.
double accelerationX = a.acceleration.x / 16384.0;
double accelerationY = a.acceleration.y / 16384.0;
double accelerationZ = a.acceleration.z / 16384.0;- Now to calculate acceleration magnitude do the RMS of g values.
double accelerationMagnitude = sqrt(pow(accelerationX, 2) + pow(accelerationY, 2) + pow(accelerationZ, 2));- For overall vibration assessment or general monitoring purposes, a frequency range of 10 Hz to 1 kHz is commonly used. This range captures a broad spectrum of vibrations and can provide a general understanding of the machine's condition. In our case, we have taken a frequency of 200Hz
float frequency_Hz = 200.0; // Desired frequency of vibration- Now the vibration velocity can be calculated using acceleration magnitude, frequency, and acceleration of gravity.
double vibrationVelocity_mm_s = accelerationMagnitude * frequency_Hz * 9.81;Data Visualization in Bytebeam Cloud
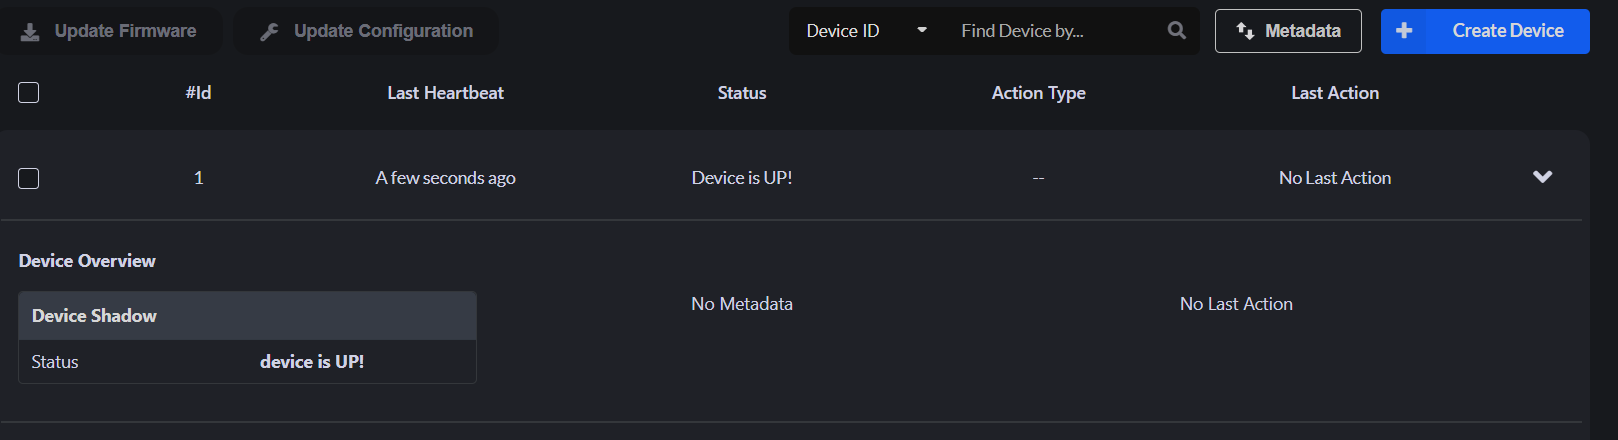
- After the Successful connection of ESP32 with Bytebeam Cloud. We can see the recent device shadow and heartbeat on the cloud console.

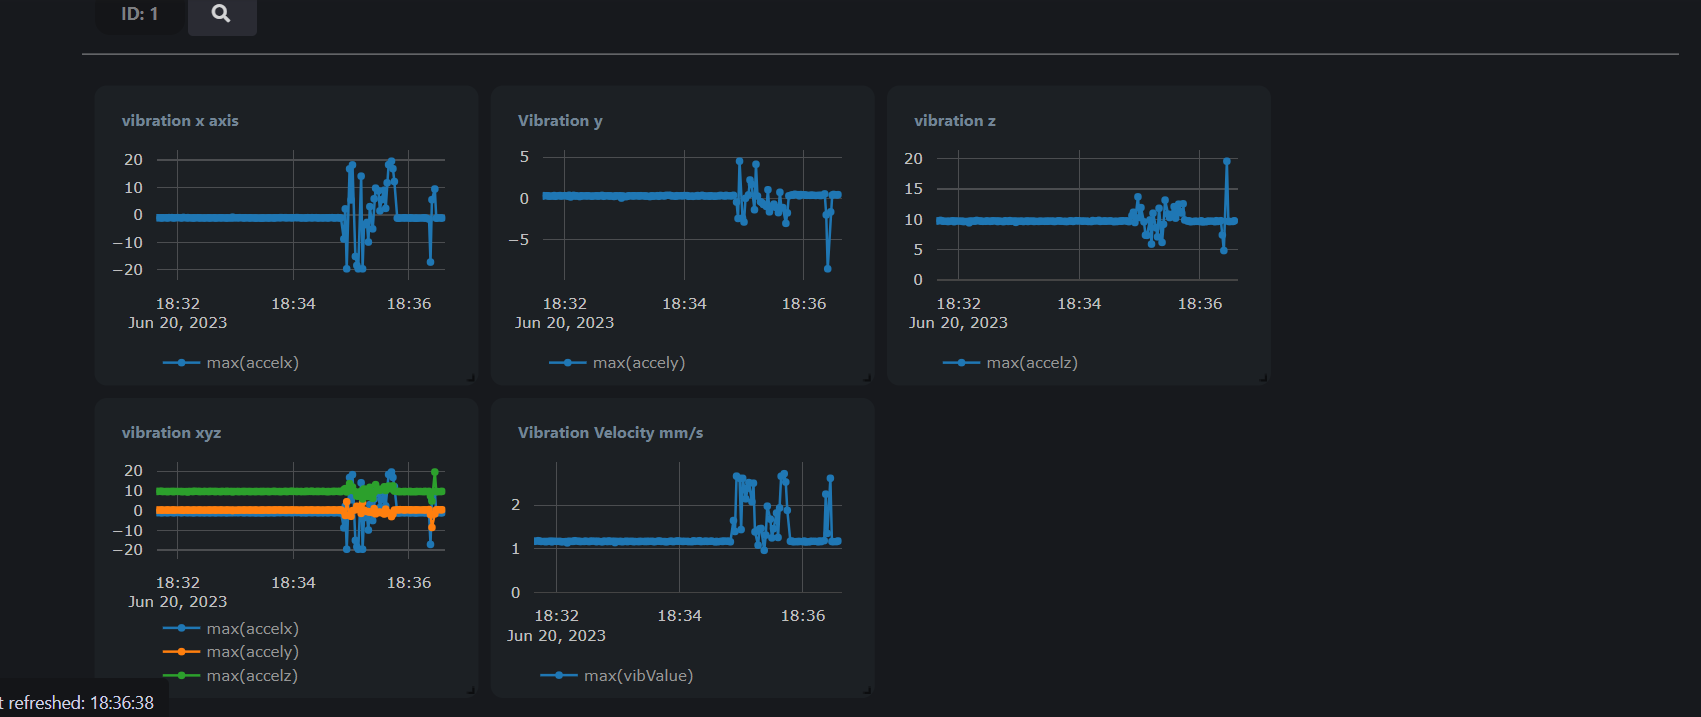
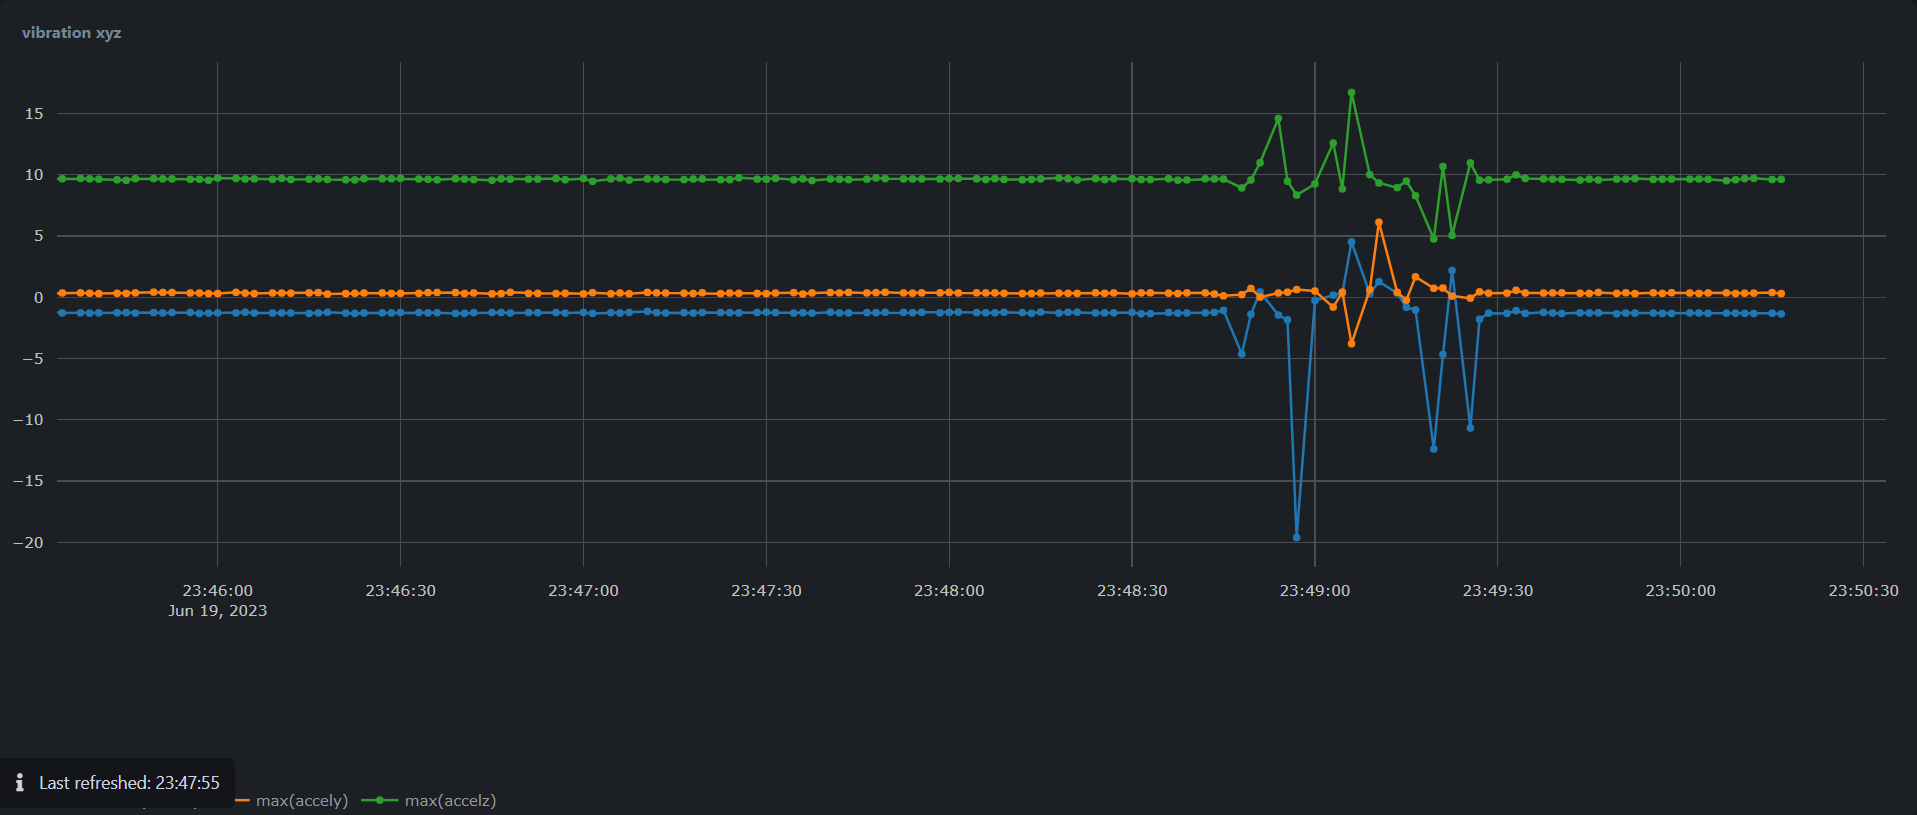
- Now let’s create a dashboard to visualize our data. Follow the Data visualization Getting Started guide to create Dashboards and visualization of your choice.
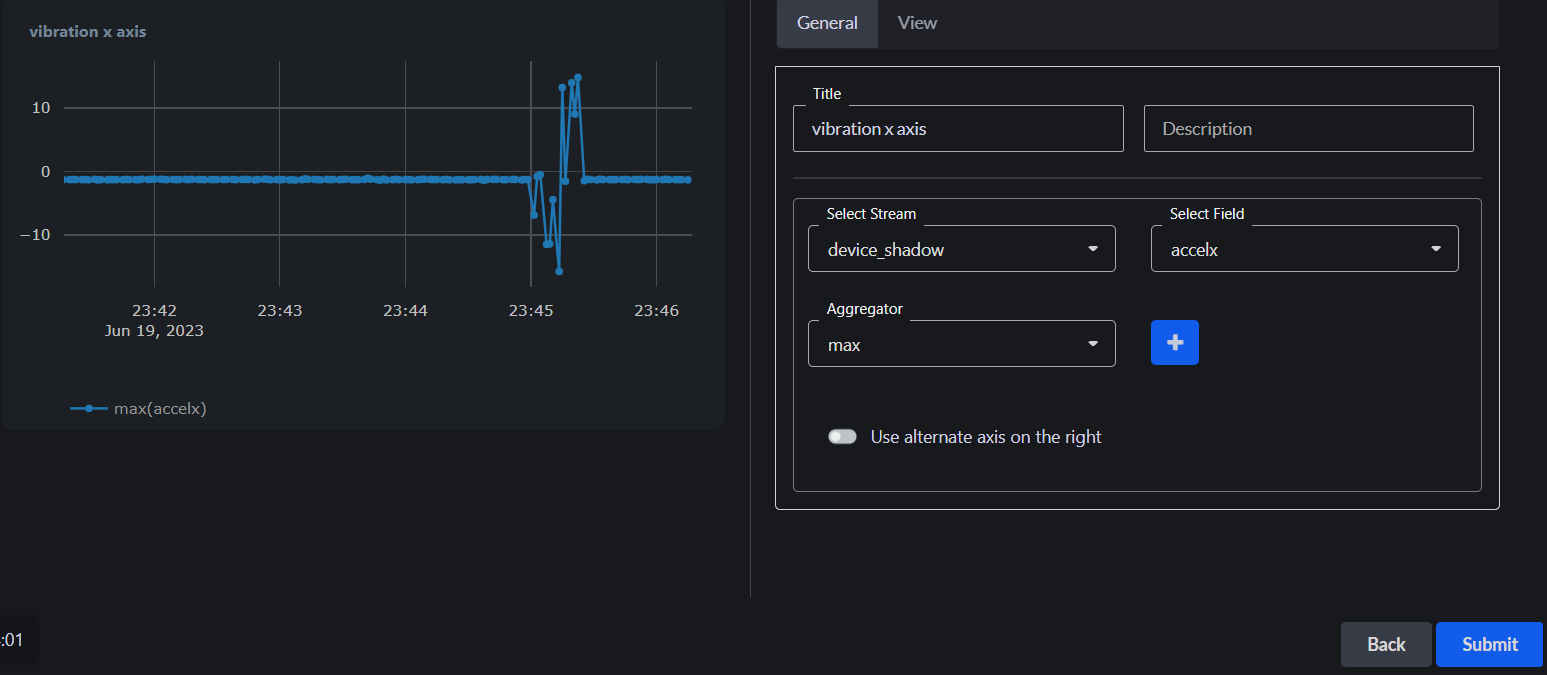
- You can create your visualization in the form of charts, gauges, histograms, last values, and many more
Conclusion
I hope you find this tutorial useful. We will come up with other interesting use cases using ByteBeam.
Explore other exciting features of the Bytebeam Arduino SDK! Check out our OTA guide for remote updates and the Handling Action Guide for remote operations.
As we continue to come up with more interesting tutorials and maker content, we invite you to explore Bytebeam further and see how our platform can empower your projects.
Stay tuned!


.png)
