Getting Started with ESP32 Arduino and ByteBeam Part 2 - Over the air updates
Learn to provision over the air updates on your IoT devices using Bytebeam cloud
Earlier in Part1 of the series, we learnt about setting up and Installing Bytebeam SDK for Arduino - ESP32 from Arduino Library Manager, concepts and guidelines of bytebeam cloud, device management, and data visualization using bytebeam dashboards.
In Part 2 of this multi-part series of tutorials, we will demonstrate how to do OTA firmware updates using the Bytebeam cloud console and the following:
- Creating new firmware: We will go through creating a new firmware and generating its bin format in Arduino
- Uploading Firmware to Bytebeam cloud: We will go through the process of creating firmware versions and uploading a new firmware on the bytebeam cloud console.
- Triggering OTA Actions: We will learn to trigger OTA action on the Bytebeam Cloud console.
- Monitoring OTA progress: We will monitor OTA progress and action status in the Bytebeam cloud console
How ByteBeam helps with OTA provisioning and device provisioning?
This guide assumes that you have gone through Part 1 and had set up ESP32 with bytebeam cloud. In this guide, we will create a new firmware for OTA on our ESP32 device and we will monitor the progress of OTA using bytebeam cloud.
So let's get started.
Hardware Requirements
Software Requirements
We recommend installing the latest version of all the tools and IDE.
Configuring OTA updates in ESP32
Before going further into our next section, We will programme our ESP32 device with a current version to demonstrate the process OTA. For that
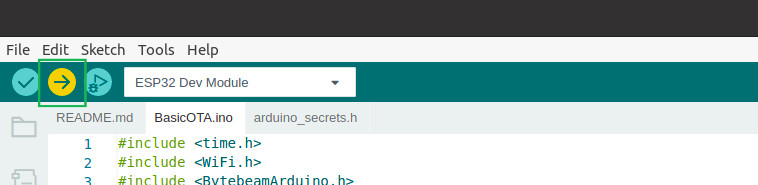
- Firstly, In Arduino Navigate to File -> Examples -> BytebeamArduino->ESP32->BasicOTA.ino.
- To Setup your Wifi credentials navigate to arduino_secrets.h and place your SSID and password here
//
// Place all the sensitive data here
//

#define SECRET_SSID ""
#define SECRET_PASS ""- Leave the fwVersion as it is. It is 1.0.0 in this example.
const char* fwVersion = "1.0.0";
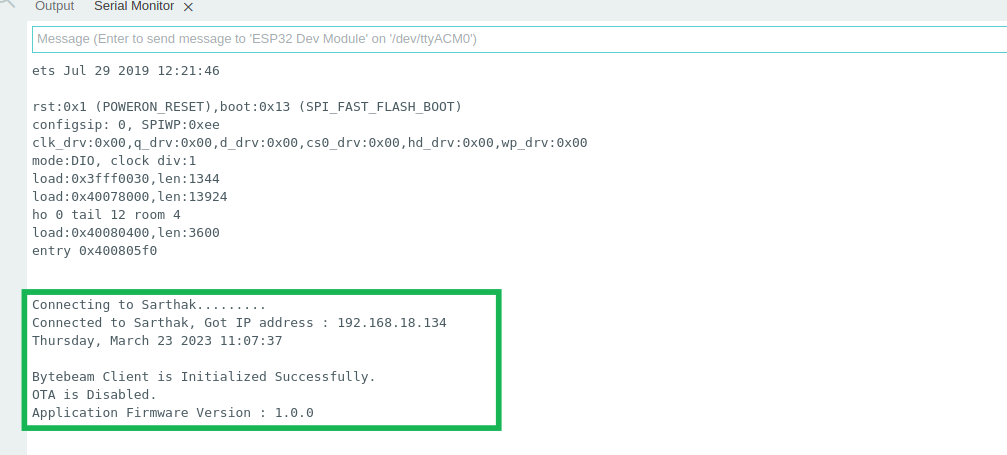
- Bytebeam Arduino library provides isOTAEnabled() API to check the status of the OTA. Call this API to check whether the OTA is enabled or not.
// check if OTA is enabled or disabled for your device
  bool OTAStatus = Bytebeam.isOTAEnabled();

  if(!OTAStatus) {
    Serial.println("OTA is Disabled.");
  } else {
    Serial.println("OTA is Enabled.");
  }
- Next, enable OTA updates for your device using enableOTA().
// enable OTA updates for your device
Bytebeam.enableOTA();- Now Upload your example by clicking on the Upload icon.
Building new firmware for updates
- Open Arduino IDE
- Navigate to File -> Examples -> BytebeamArduino -> ESP32 -> BasicOTA
- Make changes to your code by incrementing fwVersion.
const char* fwVersion = "1.0.1";
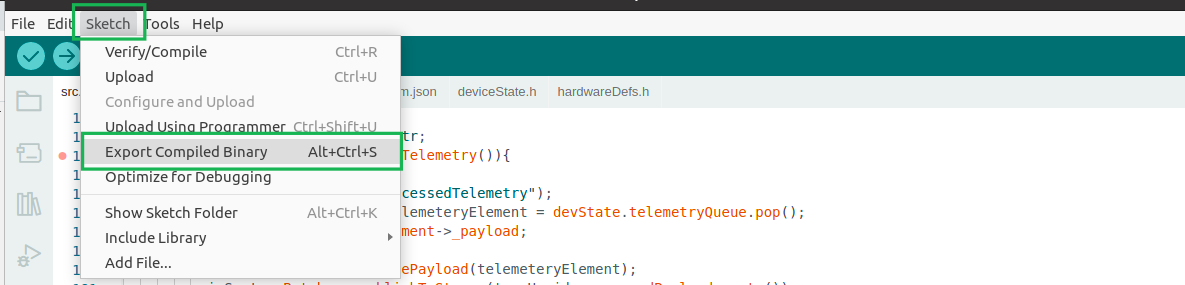
- Now go to Sketch->Export compiled Binary
- Your new binary will appear in the sketch directory. For that go to Sketch->ShowSketchFolder. Then, go inside the build directory

- Inside the build directory, you will find your sketch .ino file and its .bin file.
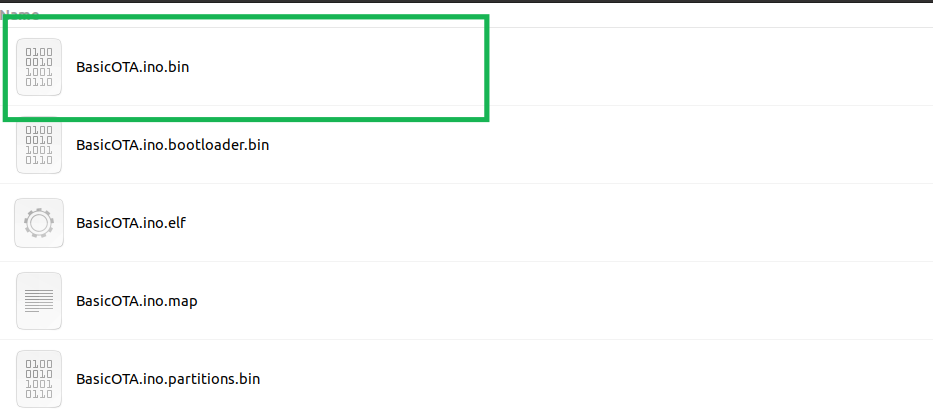
- Now in the next section, we will upload the firmware ie BasicOTA.ino.bin to the bytebeam cloud console.
Uploading firmware file for OTA to ByteBeam cloud
- Now open Bytebeam cloud. Navigate through the Device Management tab to see the last heartbeat, last action status and device shadow.
- Now click on the Firmware versions tab and upload a new firmware.
- Click on Upload New Firmware. Then on the next screen enter the new firmware version in the Firmware Version Number edit text.

- Click on Browse to upload a new firmware file ie .BasicOTA.ino.bin and click on Create

- Now you can find a new firmware version in the list of available firmware.

- Now go to the Devices tab and check in the checkbox to select the device to be updated.
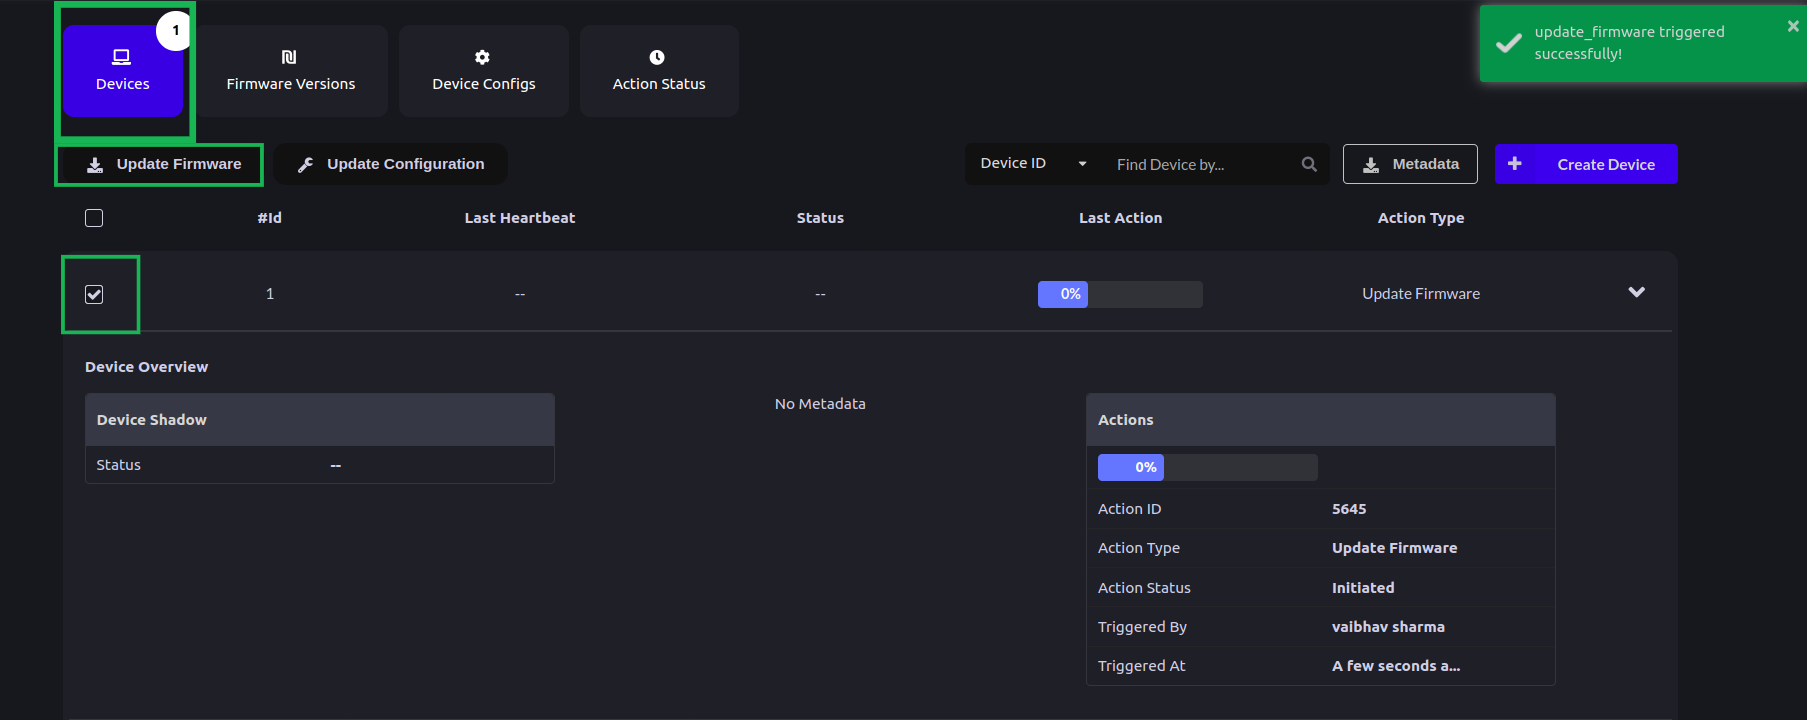
- Now click on the Update Firmware and then Select Firmware Version

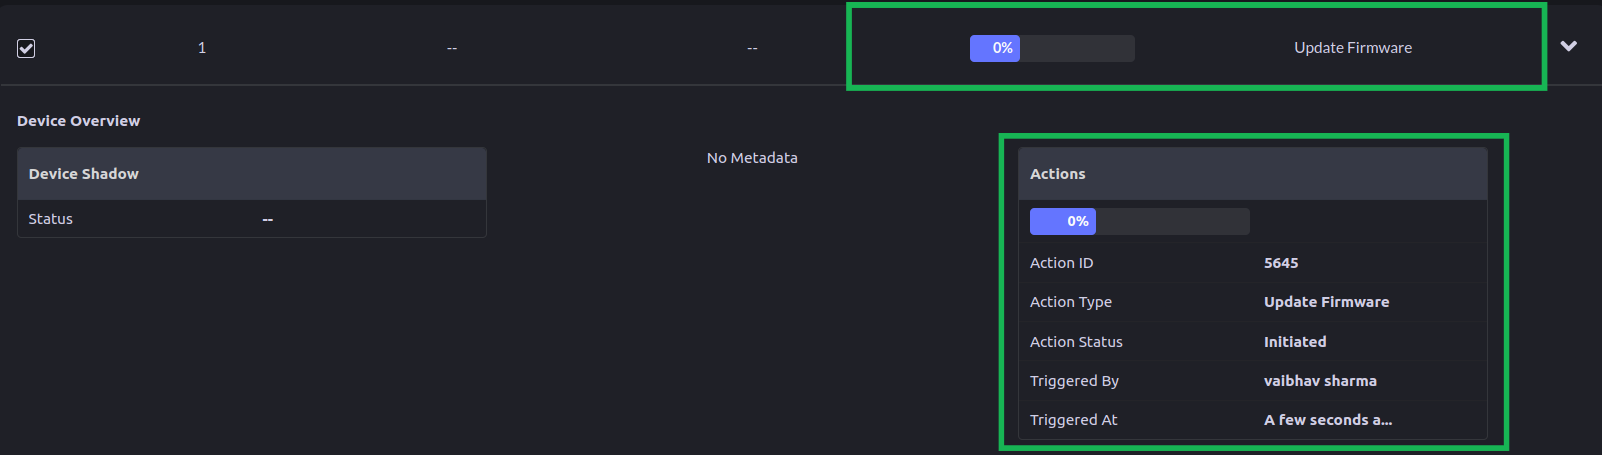
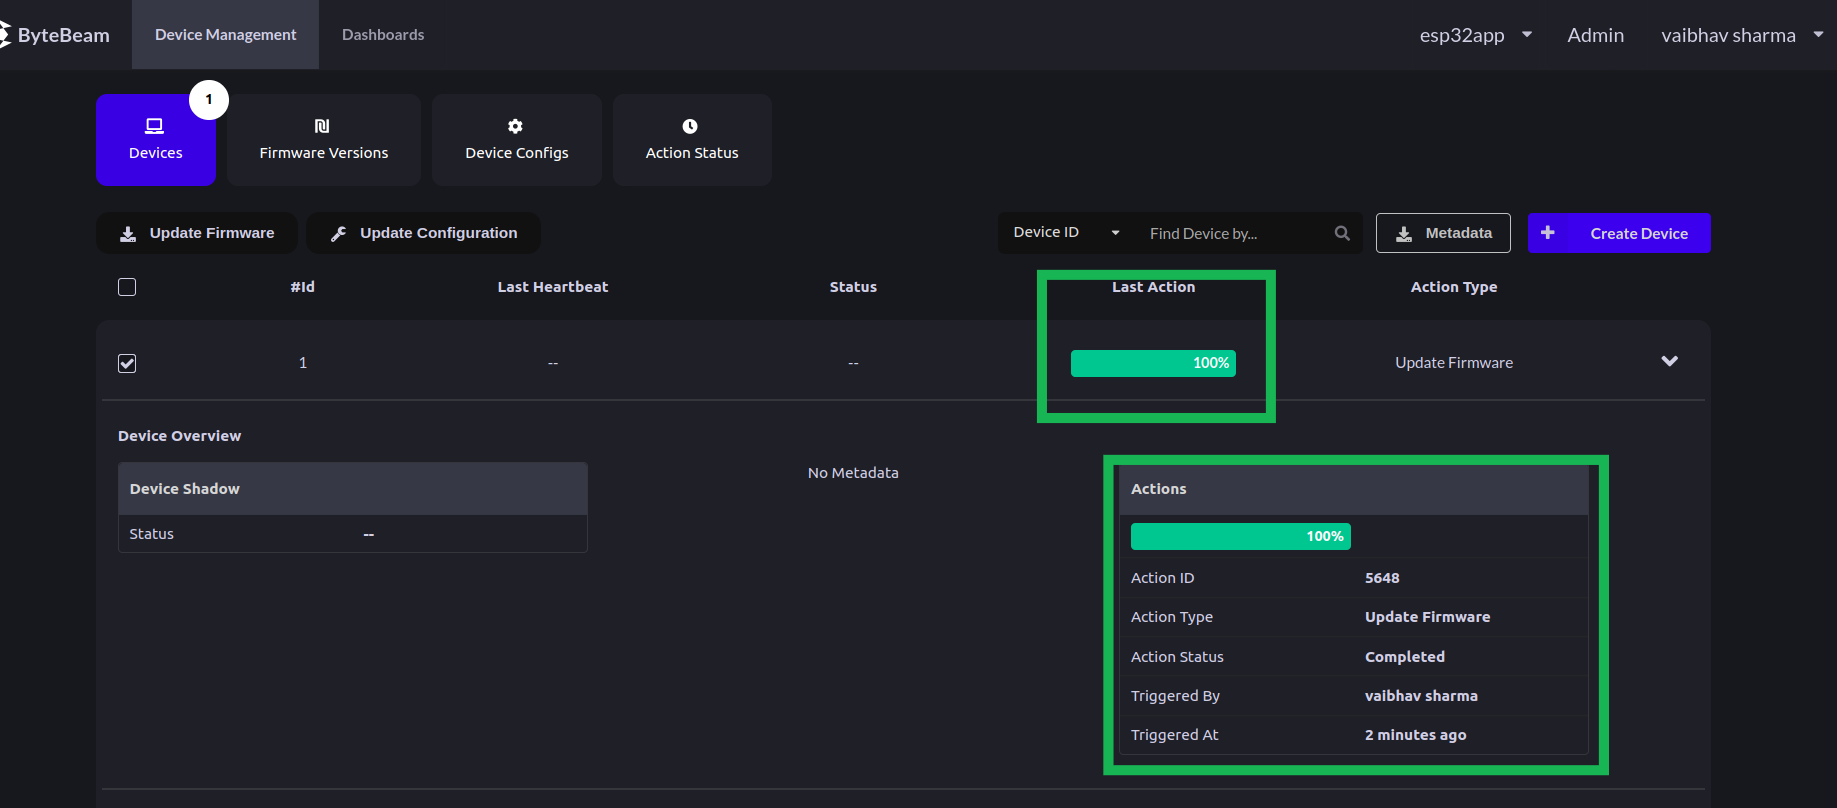
- Here in Last Action, you can see the Action ID, Action Type as Update Firmware, and Action Status as Initiated.
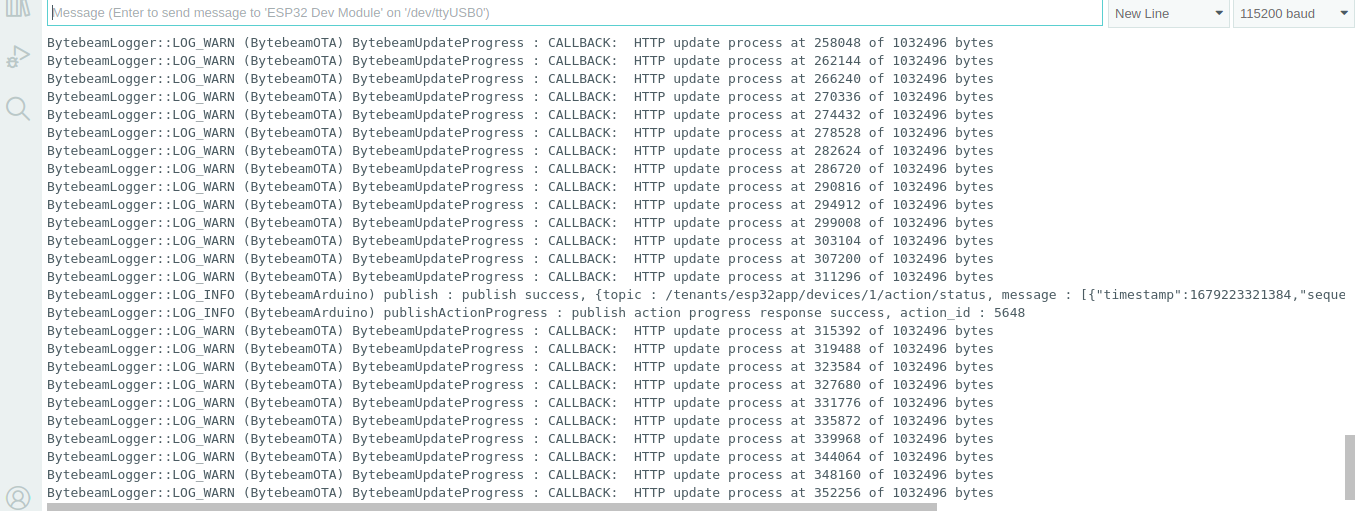
- On the ESP32 you can see the action id, URL etc.

- You can regularly monitor the process of OTA using device logs and bytebeam logs.

- After the OTA has been finished The Action Status will change to Completed.
- After the OTA process is completed ESP will get reset and you can see your updated firmware
Conclusion
I found the process to provision an OTA firmware update using ByteBeam cloud fairly easy. In the next part, we will be discussing the concept of actions in bytebeam and we will learn about creating and handling custom actions. I hope you find this guide useful. We will come up with more interesting tutorials and maker content. Stay tuned.


