Getting Started with Linux and ByteBeam Part 3 - Handling Actions
Learn to create and handle actions on your Linux devices using Bytebeam cloud
In the previous sections Part 1 and Part 2, we explored different feature of Bytebeam Cloud, which can be really useful for your IoT application.
- In Part 1 we set up the bytebeam cloud console and Bytebeam Linux agent on our Linux device.
- In Part 1 we also created a simple temperature application to demonstrate data visualization on the bytebeam cloud console.
- In Part 2 we created a tar for new firmware and performed over-the-air firmware updates on our Linux device.
Within this article, we will be focusing on action handling using the Bytebeam cloud.
What are Actions
turn on your AC remotely so that you get a nice environment when you reach your home or turn off your lights remotely to save energy bills are examples of actions.
An Action has a command-response model. It contains a set of commands that can be used to perform tasks or operations and generates a response on completion. These actions become very handy when you want to control your IoT devices remotely.
How Bytebeam helps with Action Handling
Bytebeam offers this cool feature to create an action using simple steps. Next, we will guide you through the procedure to create an action using the bytebeam cloud and handle the action on your IoT device. Here in this tutorial, we will be using action to reboot our Raspberry Pi remotely.
So let's get started.
Hardware Requirements
- Raspberry Pi 3B+ or any other recent variant of Raspberry Pi
Configuring actions on Raspberry Pi
To understand action, Let us have a look at how to create a "reboot" action that restarts the device.
- To do this we need to first register this action with uplink using its configuration file config.toml. This file will be present in /usr/local/share/bytebeam folder.
- Edit this file to add the line actions=[{name="reboot"}] under [tcpapps.1] section.
persistence_path = "/tmp/uplink"
action_redirections={update_firmware="install_firmware"}
[tcpapps.1]
port=5050
actions=[{name="reboot"}]

[downloader]
path="/tmp/uplink/download"
actions=[{name="update_firmware", timeout=610}, {name="send_file"}]

[apis]
enabled=true
port=3333

[ota_installer]
path="/tmp/uplink/installer"
actions=[{name="install_firmware", timeout=610}]
uplink_port=5050

[logging]
tags=["sshd", "systemd"]
stream_size=1
min_level=7- After this use the below code to integrate to configure reboot action on your application.
import socket
import json
import time
import os
import threading

s = socket.socket(socket.AF_INET, socket.SOCK_STREAM)
s.connect(("localhost", 5050))


# Converts JSON data received over TCP into a python dictionary
def receive_action(s):
    return json.loads(s.recv(2048))


# Constructs a payload and sends it over TCP to uplink
def send_data(s, payload):
    send = json.dumps(payload) + "\n"
    s.sendall(bytes(send, encoding="utf-8"))


# Constructs a JSON `action_status` as a response to received action on completion
def action_complete(id):
    return {
        "stream": "action_status",
        "sequence": 0,
        "timestamp": int(time.time() * 1000000),
        "action_id": id,
        "state": "Completed",
        "progress": 100,
        "errors": [],
    }


# Reboots the device
def reboot(action):
    payload = json.loads(action["payload"])
    print(payload)
    resp = action_complete(action["action_id"])
    print(resp)
    send_data(s, resp)
    os.system("sudo reboot")


def receive_actions():
    while True:
        action = receive_action(s)
        print(action)

        if action["name"] == "reboot":
            print("reboot action received")
            reboot(action)


print("Starting Uplink Bridge App")
threading.Thread(target=receive_actions).start()- Next, Restart the uplink using the following commands
sudo systemctl restart uplinkIn the next section, we will add "reboot" action on the bytebeam cloud.
Adding action on bytebeam cloud
- Login to your bytebeam cloud account and go to the Device Management tab
- Here you can see preconfigured actions like Update Firmware and Update Configuration.
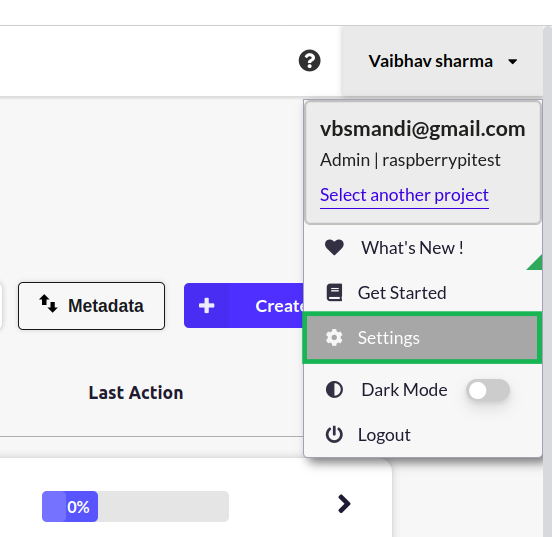
- To create a new action Click on your user name on the top right corner and then navigate to settings.
- On the settings page, Navigate to Action types and click on Create Action.
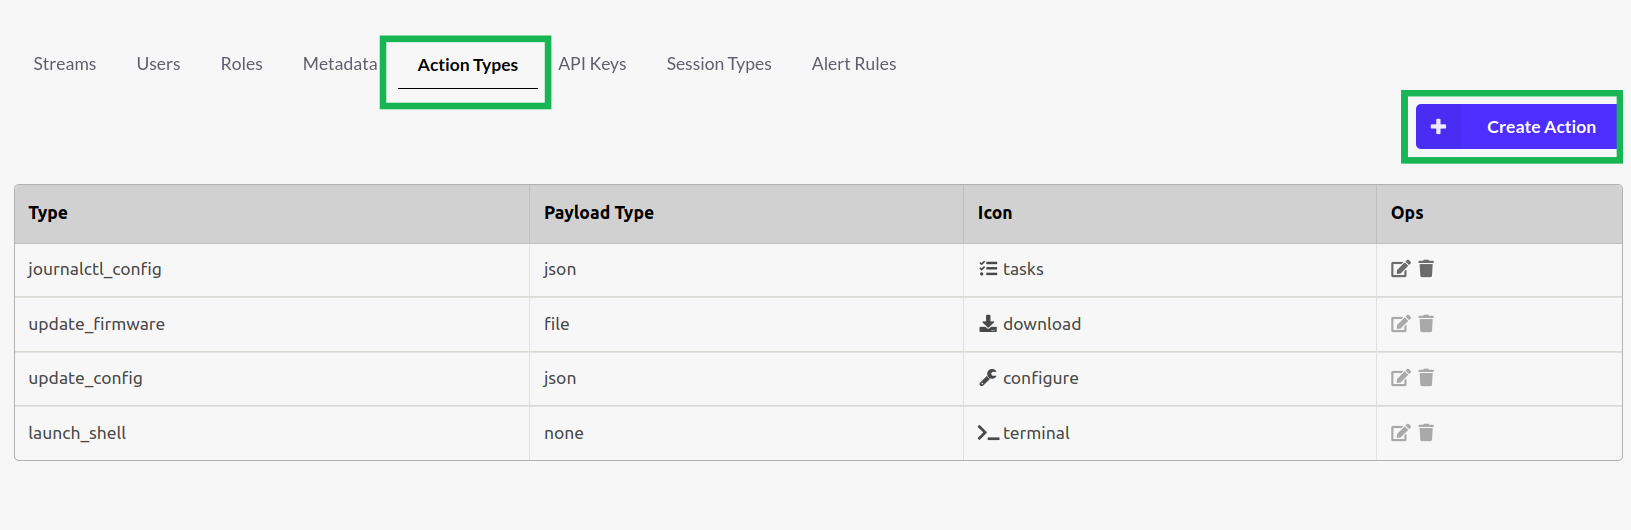
- Create action of type reboot. Select an icon of the action and leave the payload as none.

- The reboot action should now be visible on the device management page.
- Next, Select the device first then click on the Reboot action button to trigger the action.

- Next, you will see the following message. Click on Yes.

- Next, on the action panel, you can monitor the status of your last triggered action

- After completion of an action, the Action Status changes to Completed, and you should see your device reboot

Conclusion
In this way, we can provision Actions using ByteBeam. In the Part4, we will be discussing the concept logging and remote debugging and we will learn about creating and handling logs on bytebeam cloud console. I hope you find this guide useful. We will come up with more interesting tutorials and maker content. Stay tuned.


