Building Industrial IoT Applications with ESP32 and Modbus Using ByteBeam
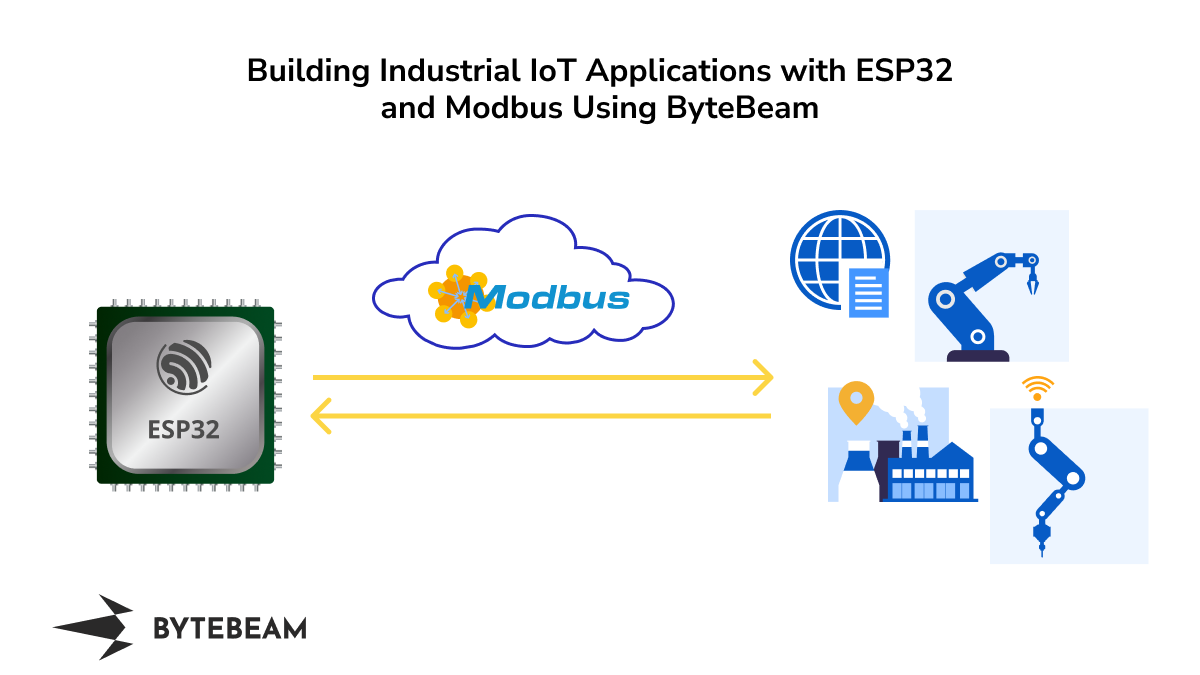
Learn to interface ESP32 with Modbus using Bytebeam
Modbus has been an integral part of industrial applications for years. In fact, it has now become the standard communication protocol for industrial control systems. IoT is becoming a hot topic nowadays, and the number of IoT devices is increasing exponentially. There is a need to put IoT into industrial applications as well. So we have come up with this tutorial to explore more about the Modbus application using ESP32 and Bytebeam. In this tutorial, we will be demonstrating the following:
- Setting up the Bytebeam cloud console: We will go through creating an account and setting up a new project on the Bytebeam cloud console.
- Setting up ESP32 with Modbus: We will set up ESP32 and integrate Modbus 485.
- Setting up the Bytebeam Arduino SDK: We will install the Bytebeam Arduino library from the Arduino library manager.
- Provisioning ESP32: We will provision ESP32 using provisioning JSON.
- Connecting an ESP32 to the Bytebeam platform: We will learn how to connect an ESP32 to the Bytebeam platform and send data from the device to the cloud.
- Data visualisation on the Bytebeam cloud console: We will explore the data visualisation tools by Bytebeam and learn how to view and analyse data from the connected Arduino device in real time.
Introduction to Modbus
Modbus is a widely used communication protocol for industrial control systems (ICS). It was developed by Modicon in 1979 as a simple and robust way to communicate between devices such as programmable logic controllers (PLCs), sensors, and actuators.
Modbus supports multiple transmission modes, like:
- Modbus RTU and Modbus ASCII are used over serial (RS-232, RS-485).
- Modbus TCP is used over Ethernet and wireless.
So let's get started.
Hardware and Software Specifications
Hardware Specification
- ESP32
- XY-MD02: SHT20 Temperature and humidity sensor over Modbus.
- Max 485 Serial to RS485 module
Software Specification
- Bytebeam cloud platform account
- Arduino IDE
- Bytebeam Arduino SDK
- ModbusMaster
- ModbusESP32 Arduino application
Setting Up Bytebeam Cloud
Bytebeam is a fully managed cloud platform. Which serves all cloud needs, from device management to dashboards, handling actions, and notifications to OTA updates. It provides the following features:
- Device Registry
- Over-the-Air Updates
- Configuration Management
- Device to mobile communication
- Web Dashboard
- Role-based access controls
If you are new to the Bytebeam IoT cloud platform, Go through the Getting Started with Bytebeam tutorial to deep dive into the concepts of Bytebeam.
I hope you found the getting started guide useful and are aware of the concepts of Bytebeam Cloud.
- First, create a new device for that Go to the Device Management panel and click on Create device

- As you hit submit in the prompt. A new JSON file will be downloaded that contains the authentication certificate, broker, device_id, and project id. You need to save this file on the ESP file system. We will talk about this in a later section.

- The JSON will look like this.
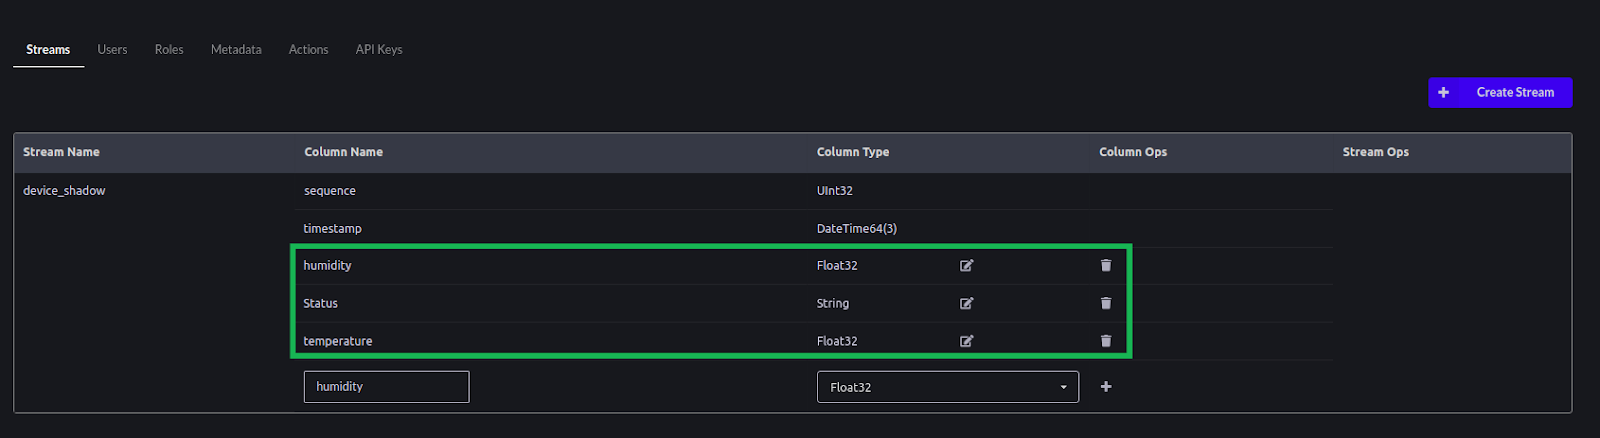
- Next, we are using temperature and humidity parameters. We need to configure the stream according to our project in the Bytebeam cloud console. For that go to Settings-> Streams and add temperature and humidity. in the column name with their respective data type.
Setting Up ESP32
This guide assumes that you are familiar with Arduino and had your ESP32 setup on Arduino IDE. The next steps will guide you through the project setup and hardware connection
Hardware connection
Next, we are going to interface Max 485 module with ESP32. You can follow the diagram below for the hardware connection.

Project Setup
Firstly to get started with Bytebeam SDK for Arduino, you need to install the Bytebeam Arduino library. This can be downloaded from the Arduino library manager. To get more understanding of Bytebeam Arduino installation and provisioning of ESP32 go through our 3-part tutorial series:
Getting Temperature and humidity values from XY-MD02
- Clone ModbusESP32 application repository from GitHub. This repository uses the following Arduino libraries
- ModbusMaster
- Open the ModbusESP32 application project and upload it to ESP32
Code Overview
Perform the following steps to calculate Temperature and Humidity values using XY-MD02 Modbus RTU sensor
- First, include the Modbus master Arduino library and initialize the Modbus master client
#include "ModbusMaster.h"
ModbusMaster master;
- Then define Modbus RX, TX and enable pins
#define MODBUS_DE_PIN   15
#define MODBUS_RE_PIN   4
#define MODBUS_RX_PIN 26 // Rx pin
#define MODBUS_TX_PIN 27 // Tx pin
- Before Modbus transmission, We need to enable Modbus RTU by giving a HIGH signal to DE and RE pins
void modbusPreTransmission()
{
  delay(500);
  digitalWrite(MODBUS_DE_PIN, HIGH);
    digitalWrite(MODBUS_RE_PIN,HIGH);
}- After Transmission, DE RE pins are kept low
void modbusPostTransmission()
{
  digitalWrite(MODBUS_DE_PIN, LOW);
    digitalWrite(MODBUS_RE_PIN,LOW);
  delay(500);
}- Next, define Serial2 for Modbus RX and TX. As per XY-MD02 documentation, Baud rate is 9600
Serial2.begin(9600, SERIAL_8E1, MODBUS_RX_PIN, MODBUS_TX_PIN);
- To begin Modbus transmission call master.begin(Slave_ID, Serial)
master.begin(1,Serial2);- As per XY-MD02 documentation, read 2 bytes from input register 0x0001.
uint8_t read_temp_humid_reg;
read_temp_humid_reg = master.readInputRegisters(1, 2);

- First, check for Modbus master exception and get temperature and humidity values
uint16_t temp = 0.0;
uint16_t humid = 0.0;
if (master.ku8MBSuccess == read_temp_humid_reg){
      temp = master.getResponseBuffer(0);
      humid = master.getResponseBuffer(1);
  }
Data Visualization in Bytebeam Cloud
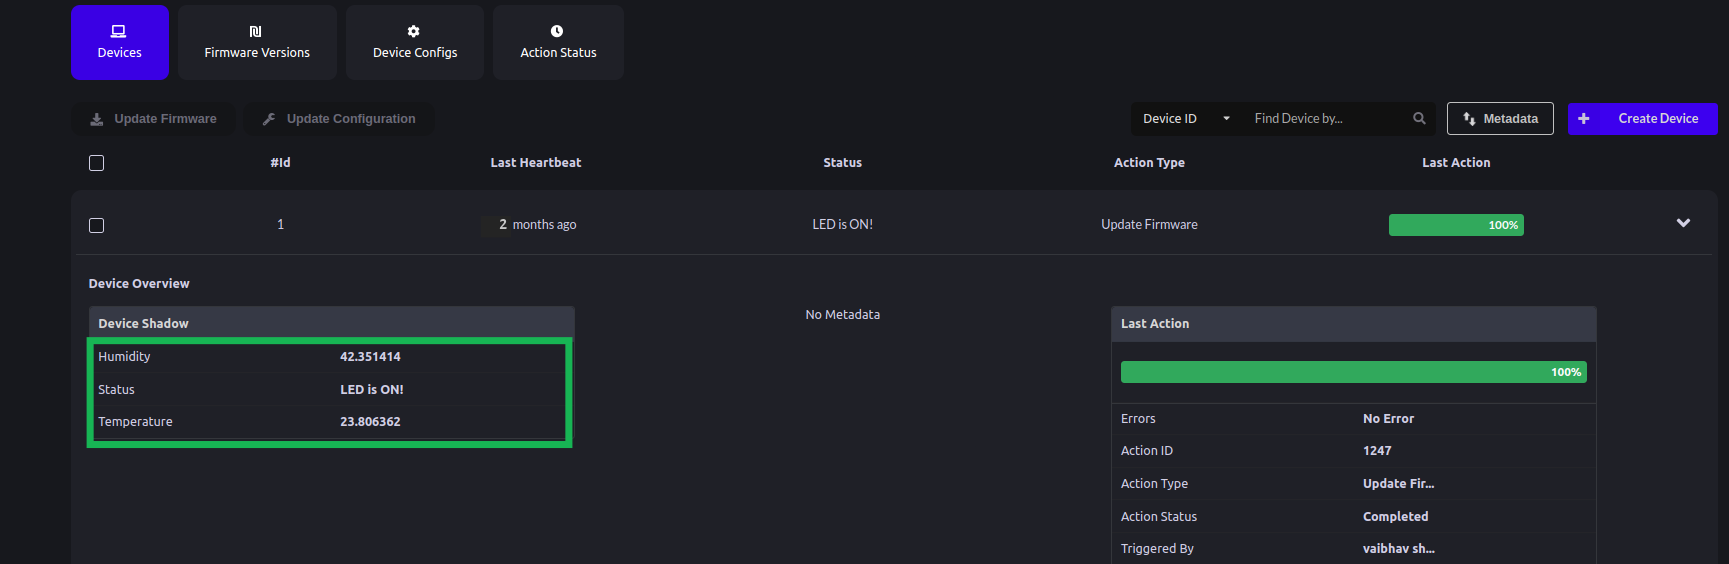
- After the Successful connection of ESP32 with Bytebeam Cloud. We can see the recent device shadow and heartbeat on the cloud console.
- Now let’s create a dashboard to visualize our data. Follow Data visualization Getting Started guide to create Dashboards and visualization of your choice.
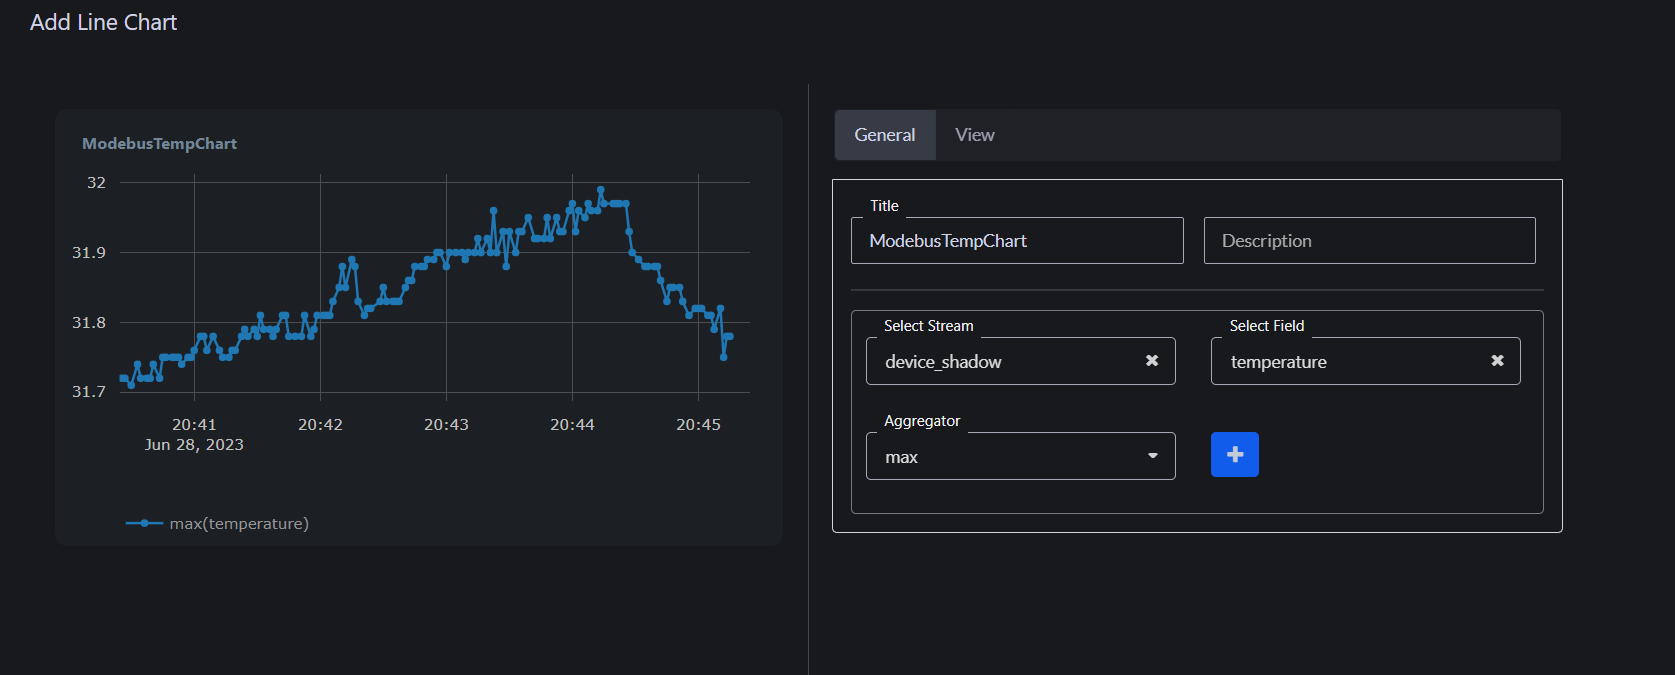
- You can create your visualization in the form of charts, gauges, histograms, last values and many more


Conclusion
I hope you find this tutorial useful. We will come up with other interesting use cases using ByteBeam.
Explore other exciting features of the Bytebeam Arduino SDK! Check out our OTA guide for remote updates and the Handling Action Guide for remote operations.
I hope you find this guide useful. As we continue to come up with more interesting tutorials and maker content, we invite you to explore Bytebeam further and see how our platform can empower your projects.
Stay tuned!


.png)
