Getting Started with Linux and ByteBeam Part 2 - Over-the-air updates
Learn to provision over the air updates on your Linux devices using Bytebeam cloud
Earlier in Part1 of the series, we learnt about setting up and Installing Bytebeam's Linux agent uplink, Connecting Linux device to the Bytebeam cloud console, device management, and data visualization using bytebeam dashboards.
In Part 2 of this multi-part series of tutorials, we will demonstrate how to do OTA firmware updates using the Bytebeam cloud console and the following:
- Creating new update tar file: We will go through creating a new firmware and generating its tar file on Raspberry Pi.
- Uploading update tar to Bytebeam cloud: We will go through the process of creating firmware versions and uploading new firmware on the bytebeam cloud console.
- Triggering OTA Actions: We will learn to trigger OTA action on the Bytebeam Cloud console.
- Monitoring OTA progress: We will monitor OTA progress and action status in the Bytebeam cloud console
Hardware Requirements
- Raspberry Pi 3B+ or Raspberry Pi 4
- 16 GB SD card
How does ByteBeam help with OTA?
This guide assumes that you have gone through Part 1 and have set up with bytebeam cloud. In this segment, we'll explore the Over-The-Air (OTA) process using the Bytebeam Cloud platform. The guide encompasses two types of updates:
1. App Update: App update replaces the old app binary on the device with the new binary uploaded to the Bytebeam cloud.
2. Deb Update: Deb update installs the provided deb package onto the device.
App Update
App update replaces the existing binary on the system with the binary uploaded on the Bytebeam cloud. We have provided an example application on our Github page. There are four files in the example.
- hello_app - Prints "Hello from Bytebeam" every 3 seconds.
- app_update.sh - This script replaces the old application with new application.
- update.sh - This is a wrapper script for app_update.sh script.
- make_firmware_update.sh - It creates the update tar file.
Prepare update tar
- Firstly on your PC, we need to create an update tar file for Raspberry Pi. For that, Download all the files mentioned above from GitHub.
- Next, we need to change the permissions for all these files using chmod command.
chmod a+x hello_app
chmod a+x app_update.sh
chmod a+x update.sh
chmod a+x make_firmware_update.sh - Next run make_firmware_update.sh to create a tar.gz file.
Uploading update tar to Bytebeam cloud
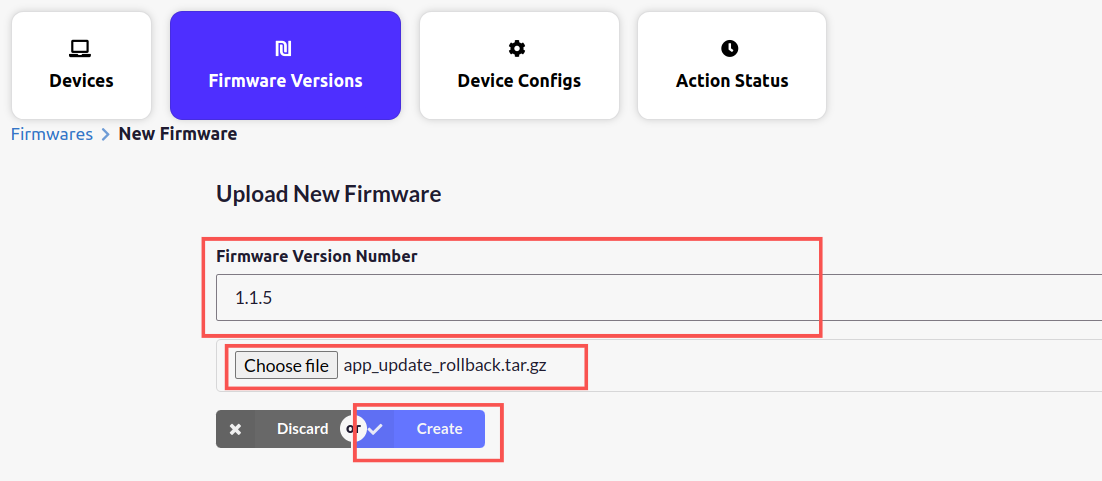
- Next, we need to upload the tar to bytebeam cloud. For that go to the device management panel and click on the Firmware Versions tab.

- Under the Firmware version tab, you will find an option to create a firmware version number and upload your updated tar file.
- Enter the new Firmware version number and click on choose file to upload tar file. Then click on Create.
Set the application path
- In the last step, we have already assumed that you want to update the hello_app that exists on your remote device and we created an update tar accordingly. On the remote device, the app is expected to be in /usr/local/bin location. If it's not there then create a new hello_app in /usr/local/bin.
#!/bin/bash

while [ 1 ]
        do
                sleep 3
                echo "Hi from Bytebeam"
done- If the application location and app name are different, set the path in app_update.sh script in last step.
APP_NAME=hello_app
APP_BIN_PATH=/usr/local/bin
Create systemctl service to debug update changes
- To debug your changes after the app update, Let's create a service that runs hello_app. So, create this service named <App Name>.service and place it in /etc/systemd/system.
[Unit]
Description=Simple Application service
After=network.target auditd.service

[Service]
ExecStart=/usr/bin/bash /usr/local/bin/hello_app
KillMode=process
Restart=on-failure
Type=simple

[Install]
WantedBy=multi-user.target- Reload systemctl daemon and start the service.
sudo systemctl daemon-reload
sudo systemctl enable hello_app.service
sudo systemctl start hello_app
Triggering OTA Actions
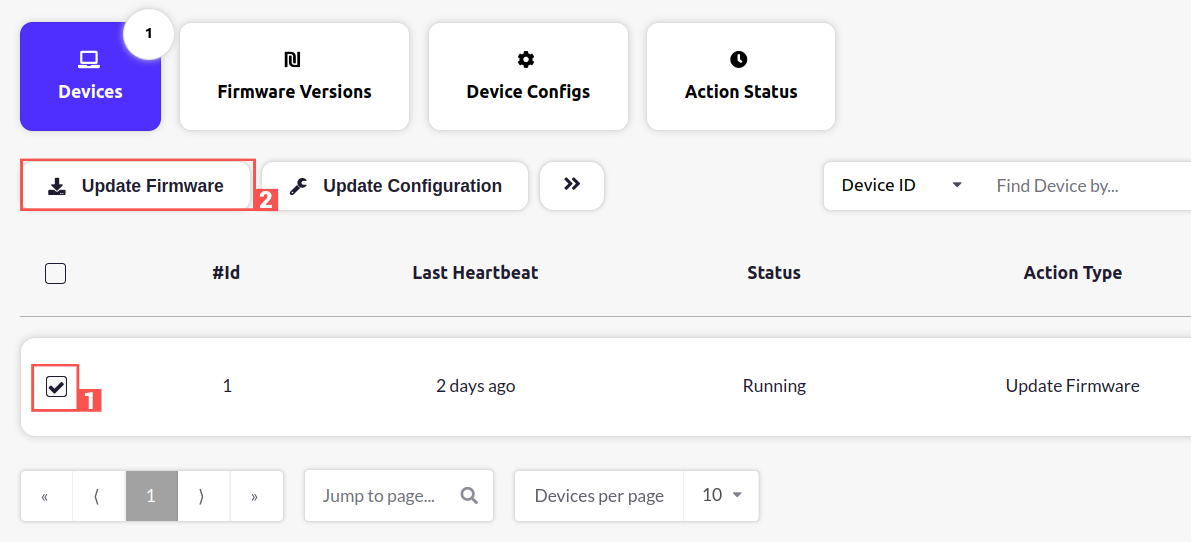
- Now let's proceed with our OTA update. For that, Go to the Device Management panel and select the device
- Next, Click on the update firmware
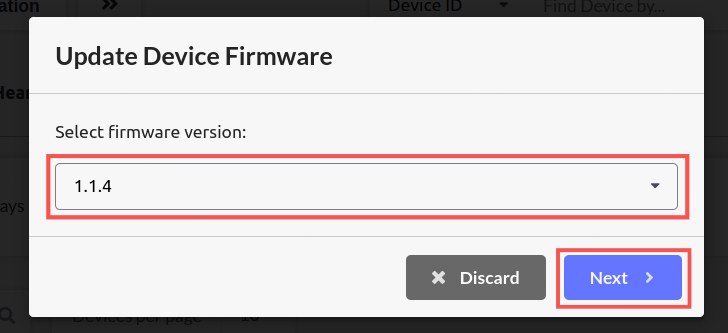
- In the next prompt choose the firmware version and click on next
Monitor OTA progress
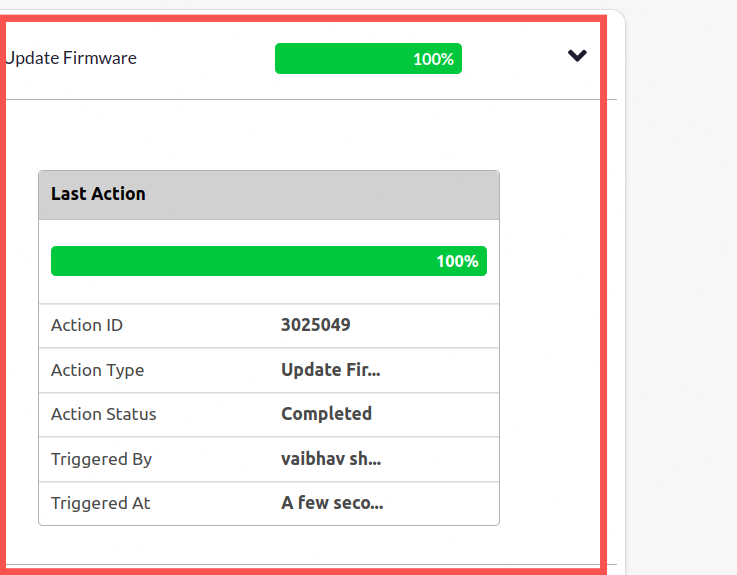
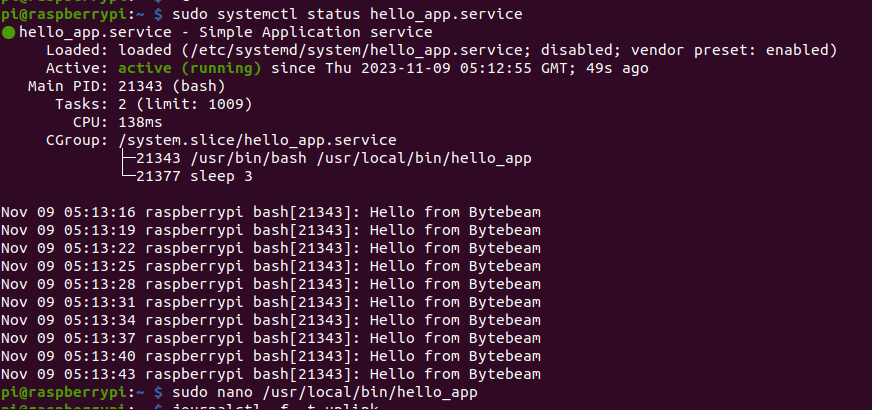
- Monitor the progress of firmware updates in the action panel. and on your remote device, you can see the updated hello_app
Deb Update
If you have a deb package to be installed on the device, then deb_update is the right way to do it. The example on Github page shows how to install a deb package on the device. There are four files mentioned in the example.
- deb_update.sh - It installs the specified deb package on the device.
- apt-src_0.25.3_all.deb - In the example, we try to install this deb package.
- update.sh - This is the wrapper script for deb_update.sh
- make_firmware_update.sh - This creates the update tar file, that needs to be uploaded on the Bytebeam cloud.
Prepare Update tar
- Firstly on your Linux system, we need to create an update tar file for Raspberry Pi. For that, Download all the files mentioned above from GitHub. Next, we need to change the permissions for all these files using chmod command
chmod a+x apt-src_0.25.3_all.deb
chmod a+x deb_update.sh
chmod a+x update.sh
chmod a+x make_firmware_update.sh - Next, run make_firmware_update.sh to create a tar.gz file.
./make_firmware_update.sh- Next, repeat the steps mentioned in the App Update section to upload the update tar, trigger "update firmware" and monitor ota action.
Conclusion
In this way, we can provision an OTA firmware update using ByteBeam. In the Part3, we will be discussing the concept of actions in bytebeam and we will learn about creating and handling custom actions. I hope you find this guide useful. We will come up with more interesting tutorials and maker content. Stay tuned.
